
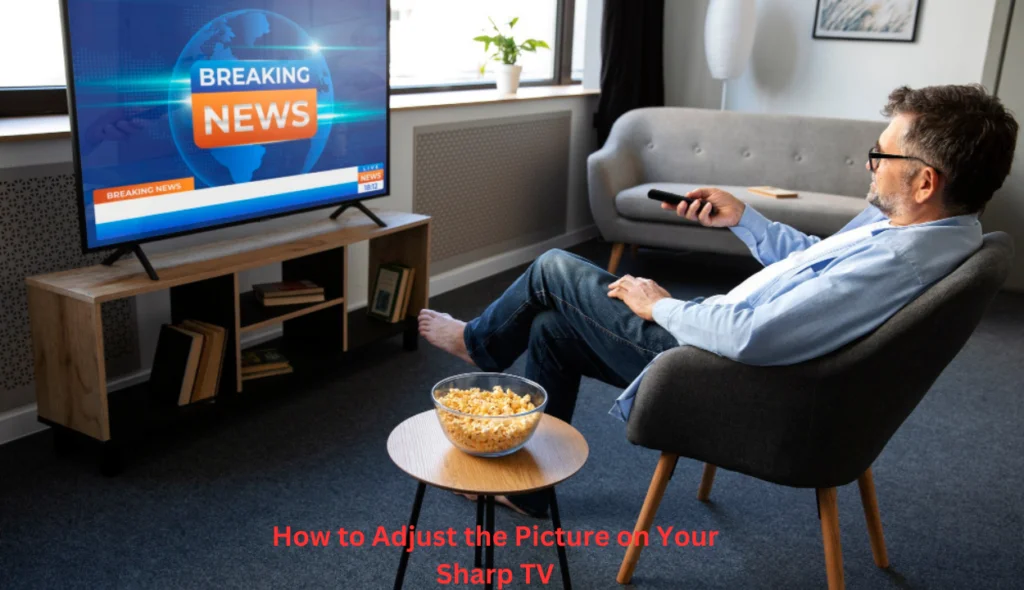
No extra squinting and straining your eyes to look what is occurring together with your preferred TV indicates. We’ve all been there – the picture in your Sharp TV just doesn’t seem quite right, but you cannot pinpoint precisely what the difficulty is or how to restore it.
Not to worry! With only a few easy tweaks to your image settings, you may have your TV looking crystal clear right away. In this short guide, you may learn the step-through-step process for adjusting key settings like brightness, comparison, shade, tint, sharpness, and extra on your Sharp TV irrespective of the model.
We’ll additionally cover how to exchange image modes to locate the proper preset for what you’re watching. With these primary customizations, your shows, movies, and video games will look better than ever. So take hold of your TV remote and let’s dive in!
“Finding Your TV Model: How to Adjust the Picture on Your Sharp TV”
To well alter your Sharp TV’s image settings, you first need to discover the precise version quantity of your TV. The settings and options can vary between models, so finding the right info for your precise TV is critical.
Look for the model range published on a label on the back of your TV. It will probably start with LC or LCR and be followed with the aid of a sequence of numbers, like LC-52D65U. Write this variety down so you have it reachable for reference.
If the label is lacking or tough to read, you can additionally locate the model number in your TV’s menu. Use the far off to pick out:
Menu System About
Scroll through the options until you spot “Model” or “Model Number“. The number indexed there may be your TV’s model wide variety.
Once you have the version number, take a look at Sharp’s aid internet site and sort it into the quest container. This must pull up the entire specifications and guide on your specific TV model. The manual will list default photograph settings in addition to the variety of modifications to be had for your TV. It will specify:
- Available photograph modes like Standard, Movie, Game, etc.
- Settings for Color, Tint, Brightness, Contrast, Sharpness and Backlight
- Any advanced settings like Color Temperature, Gamma or Noise Reduction
- Specs like the TV’s decision, refresh fee, HDR capability and element ratio.
Knowing the competencies and presets of your particular version will assist you in making the first-rate modifications for your viewing wishes and make certain an ideal picture first-class.
Take some time to explore all of the alternatives for your TV’s menu and do not hesitate to reset to manufacturing unit default settings if matters get out of whack.
With the right settings to your model of Sharp TV, you’ll be enjoying the pleasant photograph possible very quickly.
Adjusting Picture Settings
The photo settings to your Sharp TV permit you to customize the advent of the display in your liking. Tweaking some options could make a big distinction in your viewing pleasure.
To access the photo settings, press the Menu button for your Sharp TV remote. Select ‘Picture’ after which you pick ‘Advanced.’ This will open up alternatives like Brightness, Contrast, Color, Tint, and Sharpness.
Brightness refers to the overall luminance of the photograph. If the picture appears too dark, boom the brightness. If it seems washed out, lower it. For the quality picture, the brightness should be set so the black areas are dark however nevertheless show shadow elements.
Contrast controls the difference between the lightest and darkest components of the photograph. A higher evaluation makes highlights pop but can be difficult to understand in shadows.
A decreased evaluation appears stupid and flat. Adjust evaluation so the brightest components of the photo are bright but you could nonetheless see info in darkish regions.
Color intensity and Tint (for color TVs) let you adjust the shade saturation and coloration balance. If grass looks unnaturally green or pores and skin tones seem off, you may want to calibrate the color and tint. Flesh tones have to appear natural, and no unmarried color have to crush the others.
Sharpness defines the readability and detail inside the picture. Too plenty sharpness could make the image seem grainy, whilst too little offers a tender, out-of-consciousness effect. Adjust sharpness to optimize clarity and detail without introducing visual noise.
Take it slow, adjusting each setting and notice how they interact. Make small changes and look at normal content to check how it looks.
When the photo for your Sharp TV seems herbal, balanced, and desirable to your eye, you have optimized the photo settings. Your indicates, films, and gaming will now be displayed at their excellent!
How Do I Change My TV Settings to Best Picture?
Once you have your Sharp TV set up, it’s time to alter the photo settings in your liking. The default settings are high-quality for maximum people, but with a few tweaks you can get the best photograph to your needs. Here are a few pointers to get the most lovely image on your TV:
Choose a Picture Mode
Your Sharp TV will have distinctive photograph modes like Vivid, Cinema, Game, and Energy Saver. For the general first-rate picture, select both Cinema or Custom mode. These offer the most correct colors and deepest blacks.
Vivid mode can appear attractive before everything however regularly exaggerates colors. Game mode reduces enter lag however image great suffers.
Adjust Brightness
For the exceptional assessment and shadow element, set your TV’s brightness to around 50-60% of the maximum. If it’s too low, the photograph will appear dim and flat.
Too excessive washes out the photo. Look for the brightness placed for your TV’s menu below Picture Adjustments or Picture Options.
Set the Contrast
The assessment controls the difference among the lightest and darkest parts of the image. For most Sharp TVs, an assessment setting of around 60-70% of the maximum will come up with extraordinary detail in both highlights and shadows. Like brightness, too low will look stupid and too high blows out the photograph.
Adjust Sharpness
The sharpness setting determines how much side enhancement is applied to traces and edges within the photo. For the most natural-looking image, set sharpness to zero or near it. Anything higher could make the image look artificially sharp, especially on HD content material.
Set the Color Temperature
Choose both the Warm or Normal color temperature for the maximum natural, alluring image. Cool will make the photo appear too blue, and Vivid oversaturated colorations. Warm offers a barely hotter, greater movie-like pleasantness.
Turn Off Additional Features
Other functions like digital noise reduction, motion enhancement, and dynamic contrast can negatively affect image quality. Turn these off for the purest photo. You can constantly flip them back on later if you choose the impact.
With those suggestions, you may be enjoying the pleasant photo best your Sharp TV can produce. Take a while to tweak every setting to your liking for a photograph that without a doubt wows. Your favorite shows and movies will appear better than ever
What Is the Best Sharpness Setting for a TV?

The sharpness manager for your TV adjusts the definition of items and information on the screen. Setting the sharpness too excessive can make the photo appear unnatural, at the same time as putting it too low will make the entire appearance fuzzy.
Finding the right sharpness for your TV’s photograph settings will make certain photographs clean, balanced and greater realistic.
A correct rule of thumb is first of all the sharpness set across the center or default setting, usually around 50-60 on a scale of 0 to one hundred.
At this baseline, colorings have to appear natural and edges should have definition without looking overly superior or jagged.
From there, you may make small changes up or down in increments of 5-10 factors at a time. View some familiar content like your favorite TV show to see how the settings alternate the picture.
As you increase the sharpness, pay attention to the rims of objects and text on the display. At a certain point, the photo will begin to look overly processed and unrealistic. Back it down a notch.
For most content material and viewing conditions, a sharpness of 30 to 70 will come up with a balanced, high-definition enjoyment.
For HD and 4K TVs, you may want to aim at the higher cease of that range to take complete advantage of the enhanced decision. Just be careful now not to over sharpen the photograph. 4K TVs specifically can exacerbate the poor outcomes of oversharpening.
At night or in darker rooms, decreasing the sharpness barely can be more snug at the eyes. A softer, much less defined photo can seem greater herbal in low mild.
Make modifications primarily based on the lighting for your room and your personal choices.
The sharpness manage, along with other settings like brightness, evaluation, and color, paintings together to calibrate your TV for the first-rate photo.
Take it slow adjusting each placing and viewing acquainted content to locate the most reliable aggregate for your lighting fixtures conditions and viewing tastes. With some small tweaks, you’ll have your Sharp TV dialed in to show a superbly balanced, high-definition photograph.
Using the Manual Settings Controls
To alter the picture for your Sharp TV, you’ll need to get entry to the manual image settings. This will assist you to configure options like brightness, comparison, coloration, tint, and sharpness to your liking.
Head on your Sharp TV’s most important menu, normally accessed via pressing the “Menu” button on your far off. Navigate to the “Picture” menu, then choose “Advanced” or “Manual Settings.” This will also be labeled as “Pro Settings” or something similar, replying to your model.
Brightness
The brightness controls the black stage of the picture. If the brightness is too low, the photograph may also seem dim and washed out. If it’s too high, the picture can look diminished and lack contrast.
Adjust the brightness slider until the black regions of the display screen appearance wealthy and inky, but still display shadow detail.
Contrast
The evaluation controls the white level of the picture. If the comparison is too low, the photograph might also appear stupid and dead. If it’s too excessive, the image can seem overly bright and blown out.
Adjust the evaluation slider so the brightest parts of the photo nevertheless display detail, without searching hazy or washed out. Aim for crisp whites and vivid highlights.
Color
The coloration setting controls the depth of the colors inside the picture. If the coloration is too low, the photograph may look light and undersaturated.
If too high, hues can appear overpowering and unrealistic. Adjust the coloration slider to produce natural, sensible colorations that pop on screen. Flesh tones must seem natural, without an overly reddish or yellowish tint.
Tint
The tint setting controls the stability between inexperienced and red tones within the image. If the tint is about incorrectly, flesh tones and neutral colorings might also tackle an inexperienced or purple solid. Adjust the tint slider until flesh tones and neutral colorations like gray appearance are balanced and natural.
Sharpness
The sharpness of the putting controls the crispness of great details inside the picture. If the sharpness is simply too low, the photograph can seem smooth and blurry. If too excessive, the photo may appear overly processed and unrealistic.
For the quality picture, hold sharpness set to a slight degree. Increase to sharpen up soft or out-of-focus content material, however don’t over sharpen.
Spend some time experimenting with those controls to discover the settings you want best. Even minor modifications can make a huge distinction in picture best. Save your chosen settings to the preset “User” mode so you can easily don’t forget them later.
How Do I Adjust the Sharpness on a Dell Monitor?

To modify the sharpness to your Dell show, you will want to get entry to the on-display show (OSD) menu. The OSD permits you to manipulate diverse settings to your display like brightness, evaluation, coloration, and sharpness.
Locate the Menu Buttons
On the front or thing of your Dell monitor, you will locate a difficult and speedy button to open the OSD menu. Usually there are four buttons: up, down, left, and proper. The menu button, located in the center, is used to open the OSD menu.
Navigate to the Sharpness Setting
Once the OSD menu is open, use the arrow buttons to highlight the “Image” or “Display” option. Press the menu button to choose it. Next, choose out “Sharpness” or an option named option. The sharpness setting may be under an “Advanced Settings” submenu.
Adjust the Sharpness
With the sharpness option highlighted, press the left or right arrow buttons to decrease or boom the sharpness. As you alter the placing, the display picture becomes softer or crisper. For maximum Dell video display units, the sharpness range is from 0 to 100, with 50 as the default.
A decreased sharpness placing around 20 to 30 will produce a softer, smoother image that can appear slightly blurry. A better putting of 70 to ninety will bring about an extremely-crisp, sharp picture with visibly jagged edges.
For ordinary viewing, a sharpness placing of forty to 60 is suggested. This offers a balanced picture that is sharp but despite the fact that it is natural-searching.
Feel loose to check with distinct sharpness stages to find out what seems exceptional to your eyes. Once you have adjusted the sharpness, use the menu to exit the OSD.
Your Dell screen will keep the brand new sharpness putting routinely. Adjusting the sharpness manipulation is an easy way to optimize the clarity and incredibleness of the display screen image to your Dell screen. Let me apprehend you when you have different questions!
Special Modes
Your Sharp TV has numerous unique viewing modes that may enhance your enjoyment depending on what you’re watching. These modes modify the photo settings to optimize the photograph for distinct kinds of content.
Game Mode
When playing video games, switch to Game Mode. This mode reduces enter lag, that is the delay between pressing a button for your controller and seeing the movement on display.
With fast-paced games, enter lag can suggest the difference between prevailing and dropping. Game Mode disables positive video processing to minimize lag, supplying you with a cut up-second side.
PC Mode
If you’ve got a computer linked to your TV, enable PC Mode. This mode optimizes the photograph for showing content material from a PC like spreadsheets, files, and web pages. It adjusts the color temperature for an extra natural show of text and first-class information.
PC Mode additionally permits you to enable functions like screen stretching to satisfactorily healthy the photo on your TV display.
Cinema Mode
When watching films, Cinema Mode is ideal. This mode complements color, contrast and sound to provide an immersive enjoyment like in the movie theater. Motion enhancement capabilities offer smooth motion for instant-movement scenes.
Additional sound settings create surround sound for a definitely cinematic sense. Cinema Mode gives you the great experience for taking part in the trendy blockbusters from the consolation of your couch.
Sports Mode
For looking at sports activities, select Sports Mode. This mode complements shade and contrast for vibrant pics, as well as boosting the sound for an exciting experience.
Motion settings are optimized to lessen blur, imparting clean, crisp action for following all the performances. Sports Mode puts you right in the center of the movement for playing soccer, basketball, football and extra.
Try out the exceptional special viewing modes in your Sharp TV to look which you like high-quality for distinct styles of content. The optimized image and sound settings could make a big difference for your enjoyment.
Adjusting Aspect Ratio Using the Remote Control

To modify the element ratio in your Sharp TV, use the far flung manage buttons categorized as “Aspect,” “Display Mode,” or “Picture Size.” These buttons will toggle among the unique thing ratio options to choose the only that fits your viewing desires and affords the picture size you need.
- The factor ratio refers back to the ratio of the width of the picture to its top. The options on maximum Sharp TVs are:
- 16:9 (Widescreen): For HD programming and widescreen films. This fills the complete screen.
- Four:3 (Standard): For everyday broadcast TV and non-widescreen content. There can be black bars on the perimeters of the picture.
- Zoom: Enlarges the photo to fill the display screen as lots as viable but may additionally crop a number of the pinnacle and backside. Use for 4:three content.
- Dot by using Dot: Displays the picture in its original size without scaling. There will be black bars around all 4 sides of the photograph.
- Smart Stretch: Automatically adjusts 4:three photos to suit the 16:nine screen. May distort the picture slightly.
- Movie Expand: Expands widescreen films to fill greater of the display. Crops the pinnacle and bottom.
- Panorama: Expands 4:three photos using nonlinear stretching for a much wider view with much less distortion.
Once you pick your desired thing ratio, you may need to additionally alter the image length and function to suit your options. Use the “Size” or “Position” buttons at the far flung to shift, enlarge or center the picture on the display.
Changing the photograph settings, like assessment, brightness, coloration intensity, can also assist enhance the excellent and viewing enjoyment for the element ratio you select.
Take some time to observe content material and toggle between the one-of-a-kind issue ratios to discover the options you like first-rate for one-of-a-kind styles of media. Your Sharp TV gives lots of flexibility to personalize the display to your ideal image.
Read more
Aspect Ratio Types and When to Use Them
The aspect ratio on your Sharp TV refers to the proportional relationship between the width and height of the screen. There are a few common aspect ratios to choose from, and selecting the right one for what you’re watching can make a big difference in your viewing experience.
- 16:9This is the most common widescreen aspect ratio today for most TVs and streaming content. It’s ideal for watching HD movies, TV shows, and gaming. If something is filmed in widescreen, like most new movies and shows, 16:9 will fill your whole screen for an immersive experience.
- 4:3This is the traditional TV issue ratio and what maximum older TV indicates and films have been filmed in. While now not as huge as 16:9, it could be appropriate for looking at conventional reruns of shows like Seinfeld or The Brady Bunch. However, on a 16:9 display there may be black bars on the edges of the photo.
- ZoomThis alternative will extend a four:three picture to fill your 16:9 display by stretching and cropping the photograph. However, the image can become distorted. I only suggest the use of the zoom characteristic on occasion and for content material in which the stretching won’t be too important, like animated shows or movies.
- Dot by way of DotThis displays the image in its unique aspect ratio without any stretching. You’ll possibly turn out to be with black bars on the edges of a 4:three photograph, however the photograph will look as meant with the aid of preserving an appropriate proportional geometry. Use this setting in case you need to see the photo because it was firstly filmed or created.
- By familiarizing yourself with these aspect ratio sorts, you may be able to regulate your Sharp TV’s settings to exhibit whatever content you choose to observe. The most appropriate viewing pleasure is just a few clicks away! Let me understand when you have every other question on getting the maximum out of your TV.
How to Adjust the Screen on My Sharp TV?

So you simply got a new Sharp smart TV and the image doesn’t look pretty right. Maybe the colors appear off or it’s now not as sharp as you expected.
Don’t fear, adjusting the screen settings to your Sharp TV is certainly quite sincere. Here are some recommendations to help you tweak your new TV and get the quality image best:
First, ensure your TV has had sufficient time to nicely heat up. Sharp TVs can take up to 100 hours of use to completely break inside the display. During this time, you may observe the image improve on its own.
If after every week of ordinary use you’re nevertheless not happy with the photo, it’s time to take topics into your very own hands
Read more
Adjust the Picture Settings
The simplest manner to alter your Sharp TV’s image is by having access to the Picture Settings menu. You can commonly find this to your TV’s principal menu under Options, Settings or Display. Look for selections like Picture Mode, Color, Sharpness, Brightness, Contrast, and Backlight.
For the nice image, select the Movie or Cinema mode. This will give you the maximum natural searching colors and lights. You can then tweak from there primarily based on your preferences.
- Brightness – Controls how vivid the picture is. For the fine assessment, it has to be set so the darkest elements of the display are simply slightly seen.
- Contrast – Adjusts the distinction between light and dark regions. Too excessive an assessment can make the photo look unnatural.
- Color – Controls how vibrant colors appear. For realistic images, much less is more. You simplest need sufficient to make the photograph pop.
- Sharpness – Determines how sharp edges appear. Start on the halfway point and alter up or down. Too sharp can cause edges to appear jagged, even as not sharp enough ends in a blurry picture.
- Backlight – Adjusts the brightness of the TV’s backlight to decorate the general picture. Only increase from the default setting if the photograph seems too dim.
With some minor tweaks to these settings, you may have your new Sharp TV searching for its satisfaction right away. Let your eyes modify every alternate before making extra modifications and don’t forget—diffused enhancements are excellent. Keep at it and enjoy your superior viewing!
Where Is Picture Settings on Sharp TV?
To regulate your Sharp TV’s picture settings, you will want to get an entry to the on-display screen menu. Grab your far away and look for a button classified “Menu“, “Settings” or an equipment icon. Press that to open the principle menu.
From there, you’ll want to scroll through the options to locate “Picture” or “Display”. This can be below an “Advanced” tab. Select that to open the photograph settings menu. There you’ll find options to tweak things like:
Brightness – Controls how darkish or light the general display seems. For the high-quality photo, the brightness must be set so the darkest components of the picture are just slightly seen.
Contrast – Adjusts the difference between the lightest and darkest components of the photograph. A higher assessment makes shadows darker and highlights brighter, even as a decreased evaluation has an extra even tone. For most content, a medium to high assessment looks herbal.
Color – Changes the intensity of colors on the display screen. Turn it as much as make hues greater colorful and saturated or down for a more herbal, muted look.
Tint – Adjusts the balance of inexperienced and purple colorings. Use this to accurate any undesirable coloration casts in the photograph.
Sharpness – Controls aspect enhancement and makes outlines and info more or much less stated. For the most herbal image, sharpness has to be set lower. Higher settings can make a few content materials look synthetic.
Take your time adjusting each setting even as viewing normal TV content material, streaming indicates or movies, to see the way it impacts the photograph. Make small adjustments at a time and try to attain a balanced, sensible picture.
Your choices may additionally vary primarily based on the form of programming you watch, so that you can shop a couple of image modes with exceptional custom settings. With a few tweaks, you will have your new Sharp TV displaying an excellent, top notch picture very quickly!
Pros and Cons
Adjusting your TV picture settings allows you to optimize the display to your viewing options and environment. However, converting settings also can negatively affect the photograph if now not done properly. Here are some professionals and cons to hold in mind:
Pros
- Improved photo high-quality. Adjusting settings like brightness, contrast, color, and sharpness could make information clearer, colorations more vibrant, and the overall photo sharper or softer based totally to your tastes.
- Reduced eye stress. Adjusting the backlight or brightness to a decreased stage could make the image easier to your eyes, particularly in a dark room. This can lessen fatigue from prolonged viewing.
- Accommodate lighting fixtures conditions. You can also want to make changes based totally on the amount of ambient light within the room. More mild calls for better brightness, at the same time as much less light manners lowering the backlight for the nice photograph.
Cons
- Picture degradation. Pushing any setting to an extreme can distort the picture quality and color accuracy. Too high a contrast or sharpness, for example, can make the image look unnaturally harsh.
- Inaccurate colors. The factory default settings are calibrated to display colors and skin tones as accurately as possible. Adjusting the color or tint too dramatically can result in colors that look off or unrealistic.
- Difficulty resetting. If you end up with a picture you’re not satisfied with due to changing multiple settings, it can be hard to get back to the original default configuration. It’s best to only adjust one setting at a time.
- With some experimentation, you can find a combination of picture settings that optimize your viewing experience on your Sharp TV. But take it slow and trust your eyes—if something looks off, it probably is. You can always reset to the factory defaults and start over. The pros of adjusting the picture to your liking definitely outweigh the cons if you proceed carefully.
faqs
When you first get your Sharp TV, you might need to adjust the picture settings for your liking. Here are a few common questions and recommendations to help you dial inside the right picture:
How do I get right to get entry to the photograph settings menu?
Using your Sharp TV far flung, press the ‘Menu’ button, then pick out ‘Picture’ or ‘Picture Settings’. This will open up the menu in which you can alter brightness, assessment, color, sharpness, and additional.
How vibrant must I make the display show?
For the fine photo, you need the brightness excessive enough so the picture would not appear dark, but not so immoderate that the picture seems washed out.
A right starting point is spherical 50-60% of the maximum brightness. You can then alter up or down from there primarily based completely on your viewing situations and private desire.
How do I set the evaluation?
The assessment controls the distinction among the lightest and darkest components of the photo. Too little assessment will make the photo look flat, at the same time as an excessive amount will make it appear unnatural.
For maximum Sharp TVs, an assessment placing around 50-60% is a superb vicinity to begin. You need to set it excessive enough so that you can see records in each very darkish and in fact bright parts of the display screen.
What do the color and tint settings manipulate?
The color placing adjusts how saturated and colorful sun shades seem. For natural-looking colors, begin with the color spherical 50-60% of most.
The tint setting controls the stability of inexperienced and magenta tones. Adjust the tint till flesh tones especially look herbal. For most content material and lighting conditions, the default tint setting is an extremely good start.
How sharp do I have to make the photograph?
The sharpness controls how mass element enhancement is accomplished to the image. Too little sharpness will make the photo look blurry, whilst an excessive amount may want to make edges appear unnaturally advocated and details appear noisy.
For most Sharp TVs, start with the sharpness around 20-30% of maximum and adjust for your liking. A barely softer picture frequently appears the most herbal for maximum viewing.
By making small adjustments to every of those settings, you’ll be taking elements in a custom picture optimized in your viewing surroundings and personal options right away. Let your eyes decide and function a laugh tremendously-tuning your Sharp TV!
Conclusion
So there you have it – a step-by-means-of-step walkthrough on how to adjust the photograph settings on your Sharp TV for the pleasant viewing revel in.
Tweaking matters like the brightness, evaluation, color, and sharpness can definitely make your shows, films, and games pop. Don’t be afraid to experiment with the settings to discover what looks excellent to your eyes in your house.
With those easy changes, you’ll have your TV searching for its absolute excellence very quickly. Enjoy clearer pictures and stronger color and elements that clearly deliver out the most in your Sharp tv.